.png.baa68f22b2d02704a1a918ed3a8ae985.png.1fea0f4d835688771a54119d1cd217c1.png)

Tabla del Honor

Contenido popular
Showing content with the highest reputation on 29/06/22 en todas las áreas
-

Trinity 50.1 Serverfiles
BATUHAN TAYDAS and uno mas reaccionó a clocki por un tema,
Me he encontrado estos serverfiles los Trinity 50.1 se supone que son estos de aquí. No los he probado, funciona con MySQL 5.6 para compilar creo que en FreeBSD 13 es el paquete llvm90 (repito no lo he probado) Pego el locale.h #ifndef __INC_SERVICE_H__ #define __INC_SERVICE_H__ #define _IMPROVED_PACKET_ENCRYPTION_ // ÆÐŶ ¾ÏÈ£È °³¼± #define __PET_SYSTEM__ #define __UDP_BLOCK__ #define __EVENT_BANNER_FLAG__ /// < Game event banner flags #define __ALIGNMENT_AFFECT__ // Alignment affect #define ENABLE_CUBE_RENEWAL_WORLDARD #ifdef ENABLE_CUBE_RENEWAL_WORLDARD #define ENABLE_CUBE_RENEWAL_COPY_WORLDARD #define ENABLE_CUBE_RENEWAL_GEM_WORLDARD #endif /// OSF_WORK #define __WOLFMAN_CHARACTER__ // Wolfman character #ifdef __WOLFMAN_CHARACTER__ // #define __DISABLE_WOLFMAN_CREATION__ // Disable Wolfman creation #define __PLAYER_PER_ACCOUNT5__ // Enable 5 players per account #endif #define __SWAP_ITEM_SYSTEM__ // Swap items between inventory slots #define __SORT_INVENTORY_ITEMS__ // Sorts all inventory items #define __ITEM_DROP_RENEWAL__ // Item drop renewal #define __INVENTORY_4PAGES__ // 4 inventory pages #define __SPECIAL_INVENTORY_SYSTEM__ // Special inventory #define __MINI_GAME_OKEY__ // Mini game okey/runi #define __MINI_GAME_CATCH_KING__ // Mini game catch king #define __SEND_TARGET_INFO__ // Monster target information #define __SEND_TARGET_ELEMENT__ // Target element #define __7AND8TH_SKILLS__ // 7 and 8th skill #define __NEW_BLEND_AFFECT__ // New blend affect #define __12ZI_NOTICE__ // 12ZI mission notice #define __NEW_DROP_DIALOG__ // New drop dialog with remove item option #define __GUILD_LEADER_GRADE_NAME__ // Shows guild leader grade name on text tail #define __MESSENGER_BLOCK_SYSTEM__ // Messenger block list #define __MESSENGER_GM__ // Messenger gm list #define __VIEW_TARGET_DECIMAL_HP__ // View targets decimal hp #ifdef __VIEW_TARGET_DECIMAL_HP__ #define __VIEW_TARGET_PLAYER_HP__ // View target players' hp #endif #define __QUIVER_SYSTEM__ // Ninja quiver #define __IGNORE_LOW_POWER_BUFF__ // Ignore low power buff #define __CHANGE_LOOK_SYSTEM__ // Change look of item #define __HIDE_COSTUME_SYSTEM__ // Hide costume part #define __OFFLINE_PRIVATE_SHOP_SYSTEM__ // Offline private shop #define __DUNGEON_INFO_SYSTEM__ // Dungeons informations #define __EXPRESSING_EMOTIONS__ // Special actions & emotions #define __GENDER_ALIGNMENT__ // Gender alignment #define __REFINE_FAIL_TYPE__ // Extended refine fail message #define __GACHA_SYSTEM__ // Gacha boxes (x use time) #define __9THSKILL__ // 9th skill's #define __BL_WEATHER_INFO__ #define __ELEMENT_SYSTEM__ // Elements of monsters and pendants #define __PENDANT_SYSTEM__ // Talismans of elements // #define __USE_SINGLE_ADD_ATTRIBUTE__ // Use single add attribute #define __MAGIC_REDUCTION__ // Magic Reduction #define __EXTENDED_ITEM_AWARD__ // Extended item award #define __GROWTH_PET_SYSTEM__ // Growth pet system #define __SPECIAL_PVP_DUEL_OPTION__ // Special PvP duel with arguments (without critcal, penetration, posion and others...) #define __FLAG_IMAGE_SHOUT_LINE__ // Display's kingdoom flag in shout line #define __SOUL_BIND_SYSTEM__ // Soul bind items #define __QUEST_RENEWAL__ // Quest renewal with categories #define __AUTO_BLEND_AFFECT__ // Auto blend item affect #define __ANTI_EXP_RING__ // Anti experience ring #define __MOVE_CHANNEL__ // Move channel system #define __MAILBOX_SYSTEM__ // Mailbox system #if defined(__MAILBOX_SYSTEM__) #define _PORTABLE_MAILBOX_ // Portable Mailbox system (open anywhere) #endif /* #define __SHOPEX_RENEWAL__ // ShopEX renewal #ifdef __SHOPEX_RENEWAL__ #define __SHOPEX_TAB4__ // ShopEX 4 tabs #endif */ #define __SOUL_SYSTEM__ // Soul system #define __SKILL_COLOR_SYSTEM__ // Skill color system #define __DS_GRADE_MYTH__ // Dragon soul mythical grade #define __PRIVATE_SHOP_SEARCH_SYSTEM__ // Search private shop items #ifdef __PRIVATE_SHOP_SEARCH_SYSTEM__ #define __PRIVATE_SHOP_SEARCH_NEED_ITEM__ // Require special search item #endif #define __EXTENDED_DSS_RECHARGE__ // Dragon soul extended recharge #define __EXTENDED_ITEM_COUNT__ // Extend the amount of items #define __ITEM_SOCKET5__ // Extend item sockets #define __EXTENDED_BLEND__ // Extened blend affect #define __STONE_OF_BLESS__ // New refine item #define __DICE_SYSTEM__ // New dice system #define __DS_SET__ // Dragon soul handle bonus #define __MULTI_LANGUAGE_SYSTEM__ // Multi language system #define __EXTENDED_COSTUME_RECHARGE__ // Costume extended recharge #define __BATTLE_PASS_SYSTEM__ // Battle pass system #define __PLAYER_PIN_SYSTEM__ // Player PIN Code #define __SKILLBOOK_COMB_SYSTEM__ // Skill book combination #define __ATTR_SWITCH_SYSTEM__ // Attribute switcher (switch bot) #define __EXTENDED_WHISPER_DETAILS__ // Extended whisper details // #define __ITEM_POWER_SYSTEM__ // Item power #define __CHANNEL_STATUS_UPDATE__ // Channel player count #define _IMPROVED_LOGOUT_POINTS_ // Improved update packet on logout #define __DISABLE_SEND_SEQUENCE__ // Disable sequence // #define __ALLOW_EXTERNAL_PEER__ // Allow external peer API #define __SKILL_COOLTIME_UPDATE__ // Refresh skill cooldown after death /// WJ_WORK #define __WJ_SHOW_MOB_INFO__ // Show monster aggregate flag and level #define __WJ_PICKUP_ITEM_EFFECT__ // Pickup item effect #define __WJ_NEW_USER_CARE__ // User care /// Costume Systems #define __COSTUME_SYSTEM__ // Costume system #define __MOUNT_COSTUME_SYSTEM__ // Mount costume system #define __ACCE_COSTUME_SYSTEM__ // Sash costume system #define __WEAPON_COSTUME_SYSTEM__ // Weapon costume system #define __COSTUME_ATTR_SYSTEM__ // Costume attribute switchers /// Cheque & Gem System #define __CHEQUE_SYSTEM__ // Won #define __GEM_SYSTEM__ // Gem #if defined(__GEM_SYSTEM__) #define __GEM_MARKET_SYSTEM__ // Gem Market #endif /// Dungeons #define __GUILD_DRAGONLAIR_PARTY_SYSTEM__ // Guild dragon lair party system #ifdef __GUILD_DRAGONLAIR_PARTY_SYSTEM__ #define __GUILD_DRAGONLAIR__ // Guild dragon lair dungeon #ifdef __GUILD_DRAGONLAIR__ #define GUILD_DRAGONLAIR_DESTROY_STATUE_GM #define GUILD_DRAGONLAIR_LAZER_EFFECT_75HP #define GUILD_DRAGONLAIR_LAZER_EFFECT_50HP #endif #endif #define __TEMPLE_OCHAO__ // Temple of the Ochao #ifdef __TEMPLE_OCHAO__ #define TEMPLE_OCHAO_MAP_INDEX 353 #define TEMPLE_OCHAO_GUARDIAN 6405 #define TEMPLE_OCHAO_PORTAL 20415 #endif #define __EREBUS_DUNGEON__ // Erebus dungeon #ifdef __EREBUS_DUNGEON__ #define EREBUS_FINAL_BOSS 6192 #define EREBUS_HEALER 6409 #endif #endif Dejo enlaces https://mega.nz/file/A1oVWC7D#VKUQKhNdJWiitk-Xgllj5ySwzXE8BWG1Y4Nc6BWqqPg Y el src (el fichero de dentro no tiene extensión ponerle .rar al final y ya podreís descomprimir) https://mega.nz/file/xgoA2b5Z#j2kyCThVjm0UAUbnlUm7qSDfBjyvvgBd004HsuZ6X_s2 puntos -

[SERVERFILES] Kallavi2 v2
wiz hacker and uno mas reaccionó a 【ℛ-𝓝】ℛ𝔂𝓼𝒆 por un tema,
Game-MySQL: [CLIC AL BOTÓN DE "ME GUSTA" PARA VER EL ENLACE] MakePack: [CLIC AL BOTÓN DE "ME GUSTA" PARA VER EL ENLACE] Cliente: [CLIC AL BOTÓN DE "ME GUSTA" PARA VER EL ENLACE] Source: [CLIC AL BOTÓN DE "ME GUSTA" PARA VER EL ENLACE] Desactivar licencia: [CLIC AL BOTÓN DE "ME GUSTA" PARA VER EL ENLACE] AGRADECE CON ESTE BOTÓN 🡃2 puntos -
https://www.behance.net/gallery/95378485/Daichi-Webdesign posteo esta web hermosa, espero les guste, aun no e logrado hacerla funcionar el que sepa que me diga porfa Editado no paso link. "solución no solucionado" fuente:just4metin Post@Osaka2 puntos
-

Serverfile 34083 español
Matias Principe reaccionó a Dilong por un tema,
Es un SF 34k español que lo prepare para que los nuevos puedan usarlo, tiene las dungeons normales: Catacumbas, Beran-setaou y Torre deminiaca, el unico que falta es el de la baronesa araña Sistemas basicos: Atuendo, mascota (el normal del oficial), energia, evolucion de monturas (No llamaria sistema como tal a una quest, pero bueno), y bueno solo eso lo basico, no tiene cosas raras, lo que no esta en español son las preguntas del OX, por que en eso cada uno pone lo que quiere El cliente pueden usar cualquier cliente 34k junto con el launch sura para 34k si quieren que los demas entren a su server via hamachi Foto: Link: https://mega.nz/folder/uEUgHb6L#jT8FfkRkfzgkgOdJtgHgDg/folder/HJlTjJaS Navicat: root daroo Cuenta GM: admin 123 Para encender el sf deben poner: cd /usr/home/game ./panel traduccion metin2oficial.zip1 punto -
DESCARGA: [CLIC EN "ME GUSTA" PARA VER EL ENLACE]1 punto
-
SERVERFILE M2U - PT/BR
Leandro Andrade reaccionó a DrPolitica por un tema,
1 punto -
Gran Aporte "SISTEMA SHINING COMPLETO"
dioseterno reaccionó a 𝗔𝗿𝗲𝘀 por un tema,
Buenas noches zoneros y zoneras: En esta ocasion os traigo el sistema Shining completo y reparado para alas y skin de armas ya que veo que no esta publico en ningun foro. Bueno los archivos que vamos a precisar son los siguientes: Parte del Src Client o Binario como lo conozcan: De la carpeta UserInterface: -.PythonAplication.cpp -.Locale_inc.h -.Instancebase.h -.Instancebase.cpp De la carpeta GameLib: -.ItemData.h -.ItemData.cpp -.ItemManager.cpp -.ItemManager.h Bueno sabiendo ya todo lo que vamos a precisar vamos con la guia UserInterface/PythonApplication.cpp Buscamos esta linea: snprintf(szSkillDescFileName, sizeof(szSkillDescFileName), "%s/skilldesc.txt", localePath); Damos un enter y pegamos la siguiente: #ifdef ENABLE_SHINING_SYSTEM snprintf(szShiningTable, sizeof(szShiningTable), "%s/shiningtable.txt", localePath); #endif Buscamos esta linea: char szItemDesc[256]; Damos un enter y pegamos la siguiente: #ifdef ENABLE_SHINING_SYSTEM char szShiningTable[256]; #endif Buscamos esta linea: if (!rkSkillMgr.RegisterSkillTable("data/common/skilltable.txt")) { TraceError("Error while loading skilltable.txt."); return false; } Damos un enter y pegamos la siguiente: #ifdef ENABLE_SHINING_SYSTEM if (!rkItemMgr.LoadShiningTable(szShiningTable)) { Tracenf("LoadLocaleData - LoadShiningTable(%s) Error", szShiningTable); } #endif UserInterface/Locale_inc.h Aca agregaremos el siguiente define: #define ENABLE_SHINING_SYSTEM UserInterface/InstanceBase.h Aca buscamos la siguiente linea: DWORD m_armorRefineEffect; Pulsamos un enter y agregamos la siguiente linea: #ifdef ENABLE_SHINING_SYSTEM //2-Dimensions for Left & Right sided effects DWORD m_weaponShiningEffects[2][CItemData::ITEM_SHINING_MAX_COUNT]; DWORD m_armorShiningEffects[CItemData::ITEM_SHINING_MAX_COUNT]; DWORD m_acceShiningEffects[CItemData::ITEM_SHINING_MAX_COUNT]; #endif Aca quiero aclarar una cosa: Si en vuestro sistema de estolas de envez de llevar acce lleva sash cambian la linea anterior por esta: #ifdef ENABLE_SHINING_SYSTEM //2-Dimensions for Left & Right sided effects DWORD m_weaponShiningEffects[2][CItemData::ITEM_SHINING_MAX_COUNT]; DWORD m_armorShiningEffects[CItemData::ITEM_SHINING_MAX_COUNT]; DWORD m_sashShiningEffects[CItemData::ITEM_SHINING_MAX_COUNT]; #endif Ahora buscamos la siguiente linea: UINT __GetRefinedEffect(CItemData* pItem); Pulsamos un enter y agregamos la siguiente: #ifdef ENABLE_SHINING_SYSTEM void __GetShiningEffect(CItemData* pItem); void __ClearWeaponShiningEffect(bool detaching = true); void __ClearArmorShiningEffect(bool detaching = true); void __ClearAcceShiningEffect(bool detaching = true); void __AttachAcceShiningEffect(int effectIndex, const char* effectFileName, const char* boneName = "Bip01 Spine2"); void __AttachWeaponShiningEffect(int effectIndex, const char* effectFileName, const char* boneName = "Bip01"); void __AttachArmorShiningEffect(int effectIndex, const char* effectFileName, const char* boneName = "Bip01"); #endif Aca quiero explicar 1 cosa: Aca es lo mismo que en la anterior linea, si ustedes de envez de usar acce usan sash remplazan la linea por esta: #ifdef ENABLE_SHINING_SYSTEM void __GetShiningEffect(CItemData* pItem); void __ClearWeaponShiningEffect(bool detaching = true); void __ClearArmorShiningEffect(bool detaching = true); void __ClearSashShiningEffect(bool detaching = true); void __AttachSashShiningEffect(int effectIndex, const char* effectFileName, const char* boneName = "Bip01 Spine2"); void __AttachWeaponShiningEffect(int effectIndex, const char* effectFileName, const char* boneName = "Bip01"); void __AttachArmorShiningEffect(int effectIndex, const char* effectFileName, const char* boneName = "Bip01"); #endif UserInterface/InstanceBase.cpp Buscamos la siguiente funcion void CInstanceBase::SetArmor(DWORD dwArmor) { ... } Y dentro de esta funcion buscamos lo siguiente __GetRefinedEffect(pItemData); Pulsamos un enter y agregamos la siguiente linea: #ifdef ENABLE_SHINING_SYSTEM __GetShiningEffect(pItemData); #endif Quedando asi: __GetRefinedEffect(pItemData); #ifdef ENABLE_SHINING_SYSTEM __GetShiningEffect(pItemData); #endif Ahora dentro de la misma funcion buscamos la siguiente linea: __ClearArmorRefineEffect(); Pulsamos un enter y agregamos lo siguiente: #ifdef ENABLE_SHINING_SYSTEM __ClearArmorShiningEffect(); #endif UserInterface/InstanceBase.cpp Aca buscamos la siguiente funcion: void CInstanceBase::SetAcce "Recuerden que si su sistema de estolas no es acce lo cambian por Sash" { .... } Dentro de esta funcion buscamos lo siguiente: ClearAcceEffect(); Pulsamos un enter y agregamos la siguiente linea: #ifdef ENABLE_SHINING_SYSTEM __ClearAcceShiningEffect(); #endif Luego dentro de la misma funcion mas abajo buscamos lo siguiente: CItemManager::Instance().GetItemDataPointer(dwAcce, &pItemData); "Si no usan acce lo cambian por sash" Pulsamos enter y mas abajo pegamos lo siguiente: #ifdef ENABLE_SHINING_SYSTEM if (pItemData) __GetShiningEffect(pItemData); #endif Quedando asi: CItemManager::Instance().GetItemDataPointer(dwAcce, &pItemData); #ifdef ENABLE_SHINING_SYSTEM if (pItemData) __GetShiningEffect(pItemData); #endif m_GraphicThingInstance.AttachAcce(pItemData, fSpecular); UserInterface/InstanceBase.cpp "Ahora atentos en la siguiente funcion ya que si no lo hacen bien no funcionara en las armas ni en las skin" Buscamos la siguiente funcion: bool CInstanceBase::SetWeapon(DWORD eWeapon) { ... } Dentro de esta funcion buscamos la siguiente linea: __GetRefinedEffect(pItemData); Pulsamos un enter y agregamos lo siguiente: #ifdef ENABLE_SHINING_SYSTEM __GetShiningEffect(pItemData); #endif Ahora buscamos la siguiente linea: __ClearWeaponRefineEffect(); Pulsamos un enter y agregamos lo siguiente: #ifdef ENABLE_SHINING_SYSTEM __ClearWeaponShiningEffect(); #endif "AHORA MUY ATENTOS AL CODIGO QUE PONDRE EN PANTALLA DEBERAN DE HACERLO TAL CUAL LO DEJO ACA" "CON LOS CORCHETES TAL CUAL ESTAN EN LA FUNCION" MI CODIGO CItemData * pItemData; if (CItemManager::Instance().GetItemDataPointer(eWeapon, &pItemData)) { ---------------------------ESTOS CORCHETES DEBERAN DE AGREGARLOS TAL CUAL PUSE ACA __GetRefinedEffect(pItemData); #ifdef ENABLE_SHINING_SYSTEM __GetShiningEffect(pItemData); #endif } ---------------------------ESTOS CORCHETES DEBERAN DE AGREGARLOS TAL CUAL PUSE ACA else { ---------------------------ESTOS CORCHETES DEBERAN DE AGREGARLOS TAL CUAL PUSE ACA __ClearWeaponRefineEffect(); #ifdef ENABLE_SHINING_SYSTEM __ClearWeaponShiningEffect(); #endif } ---------------------------ESTOS CORCHETES DEBERAN DE AGREGARLOS TAL CUAL PUSE ACA return true; } UserInterface/Instancebase.cpp Ahora buscamos esta funcion void CInstanceBase::__Initialize() { ..... } Y dentro de ella vamos a buscar la siguiente linea: m_armorRefineEffect = 0; Pulsamos enter y agregamos la siguiente linea: #ifdef ENABLE_SHINING_SYSTEM __ClearWeaponShiningEffect(false); #endif UserInterface/InstanceBase.cpp Ahora agregamos todo este bloque completo al final del archivo #ifdef ENABLE_SHINING_SYSTEM void CInstanceBase::__GetShiningEffect(CItemData* pItem) { bool removeRefineEffect = true; CItemData::TItemShiningTable shiningTable = pItem->GetItemShiningTable(); if (pItem->GetType() == CItemData::ITEM_TYPE_WEAPON) { __ClearWeaponShiningEffect(); if (removeRefineEffect) { bool bRemove = false; for (int i = 0; i < CItemData::ITEM_SHINING_MAX_COUNT; i++) if (strcmp(shiningTable.szShinings[i], "")) bRemove = true; if (bRemove) __ClearWeaponRefineEffect(); } for (int i = 0; i < CItemData::ITEM_SHINING_MAX_COUNT; i++) { if (strcmp(shiningTable.szShinings[i], "")) { #ifdef ENABLE_WOLFMAN_CHARACTER bool twoSidedWeapon = pItem->GetSubType() == CItemData::WEAPON_DAGGER || pItem->GetSubType() == CItemData::WEAPON_CLAW || (IsMountingHorse() && pItem->GetSubType() == CItemData::WEAPON_FAN); #else bool twoSidedWeapon = pItem->GetSubType() == CItemData::WEAPON_DAGGER || (IsMountingHorse() && pItem->GetSubType() == CItemData::WEAPON_FAN); #endif if (twoSidedWeapon) { __AttachWeaponShiningEffect(i, shiningTable.szShinings[i], "PART_WEAPON_LEFT"); } if (pItem->GetSubType() == CItemData::WEAPON_BOW) __AttachWeaponShiningEffect(i, shiningTable.szShinings[i], "PART_WEAPON_LEFT"); else __AttachWeaponShiningEffect(i, shiningTable.szShinings[i], "PART_WEAPON"); } } } #ifdef ENABLE_COSTUME_SYSTEM else if (pItem->GetType() == CItemData::ITEM_TYPE_COSTUME) { #ifdef ENABLE_ACCE_SYSTEM if (pItem->GetSubType() == CItemData::COSTUME_ACCE) { for (int i = 0; i < CItemData::ITEM_SHINING_MAX_COUNT; i++) { if (strcmp(shiningTable.szShinings[i], "")) { __AttachAcceShiningEffect(i, shiningTable.szShinings[i], "Bip01 Spine2"); } } } #endif else if (pItem->GetSubType() == CItemData::COSTUME_BODY) { if (removeRefineEffect) { __ClearArmorRefineEffect(); } for (int i = 0; i < CItemData::ITEM_SHINING_MAX_COUNT; i++) { if (strcmp(shiningTable.szShinings[i], "")) { __AttachArmorShiningEffect(i, shiningTable.szShinings[i]); } } } #ifdef ENABLE_WEAPON_COSTUME_SYSTEM else if (pItem->GetSubType() == CItemData::COSTUME_WEAPON) { __ClearWeaponShiningEffect(); if (removeRefineEffect) { __ClearWeaponRefineEffect(); } for (int i = 0; i < CItemData::ITEM_SHINING_MAX_COUNT; i++) { if (strcmp(shiningTable.szShinings[i], "")) { bool twoSidedWeapon = pItem->GetValue(3) == CItemData::WEAPON_DAGGER || (IsMountingHorse() && pItem->GetValue(3) == CItemData::WEAPON_FAN); if (twoSidedWeapon) { __AttachWeaponShiningEffect(i, shiningTable.szShinings[i], "PART_WEAPON_LEFT"); } if (pItem->GetValue(3) == CItemData::WEAPON_BOW) __AttachWeaponShiningEffect(i, shiningTable.szShinings[i], "PART_WEAPON_LEFT"); else __AttachWeaponShiningEffect(i, shiningTable.szShinings[i], "PART_WEAPON"); } } } #endif } #endif else { if (removeRefineEffect) { __ClearArmorRefineEffect(); } for (int i = 0; i < CItemData::ITEM_SHINING_MAX_COUNT; i++) { if (strcmp(shiningTable.szShinings[i], "")) { __AttachArmorShiningEffect(i, shiningTable.szShinings[i]); } } } } //Attaching the shining effect. //BoneName can be "PART_WEAPON" or "PART_WEAPON_LEFT" to get the attaching bone name dynamically. //If boneName is not given "Bip01" is used as boneName. void CInstanceBase::__AttachWeaponShiningEffect(int effectIndex, const char* effectFileName, const char* boneName) { if (IsAffect(AFFECT_INVISIBILITY)) { return; } if (effectIndex >= CItemData::ITEM_SHINING_MAX_COUNT) { return; } CEffectManager::Instance().RegisterEffect(effectFileName, false, false); if (!strcmp(boneName, "PART_WEAPON")) { const char* c_szRightBoneName; m_GraphicThingInstance.GetAttachingBoneName(CRaceData::PART_WEAPON, &c_szRightBoneName); if (c_szRightBoneName == NULL) return; if (strcmp(c_szRightBoneName, "")) { m_weaponShiningEffects[0][effectIndex] = m_GraphicThingInstance.AttachEffectByName(0, c_szRightBoneName, effectFileName); } } else if (!strcmp(boneName, "PART_WEAPON_LEFT")) { const char* c_szLeftBoneName; m_GraphicThingInstance.GetAttachingBoneName(CRaceData::PART_WEAPON_LEFT, &c_szLeftBoneName); if (c_szLeftBoneName == NULL) return; if (strcmp(c_szLeftBoneName, "")) { m_weaponShiningEffects[1][effectIndex] = m_GraphicThingInstance.AttachEffectByName(0, c_szLeftBoneName, effectFileName); } } else { Tracef("Invalid partname for getting attaching bone name. %s - %s", effectFileName, boneName); } } //Attaching the armor shining effect. //If boneName is not given "Bip01" is used as boneName. void CInstanceBase::__AttachArmorShiningEffect(int effectIndex, const char* effectFileName, const char* boneName) { if (IsAffect(AFFECT_INVISIBILITY)) { return; } if (effectIndex >= CItemData::ITEM_SHINING_MAX_COUNT) { return; } if (!strcmp(boneName, "")) { Tracef("Empty bone name for attaching armor shining. Effect Index: %i, EffectFileName: %s", effectIndex, effectFileName); return; } CEffectManager::Instance().RegisterEffect(effectFileName, false, false); m_armorShiningEffects[effectIndex] = m_GraphicThingInstance.AttachEffectByName(0, boneName, effectFileName); } //Clears all weapon shining effects. Left & Right if set. void CInstanceBase::__ClearWeaponShiningEffect(bool detaching) { for (int i = 0; i < CItemData::ITEM_SHINING_MAX_COUNT; i++) { if (m_weaponShiningEffects[0][i]) { if (detaching) { __DetachEffect(m_weaponShiningEffects[0][i]); } m_weaponShiningEffects[0][i] = 0; } if (m_weaponShiningEffects[1][i]) { if (detaching) { __DetachEffect(m_weaponShiningEffects[1][i]); } m_weaponShiningEffects[1][i] = 0; } } } //Clears all armor shining effects. void CInstanceBase::__ClearArmorShiningEffect(bool detaching) { if (detaching) { for (int i = 0; i < CItemData::ITEM_SHINING_MAX_COUNT; i++) { if (m_armorShiningEffects[i]) { __DetachEffect(m_armorShiningEffects[i]); } } } memset(&m_armorShiningEffects, 0, sizeof(m_armorShiningEffects)); } #endif #ifdef ENABLE_SHINING_SYSTEM #ifdef ENABLE_ACCE_SYSTEM void CInstanceBase::__AttachAcceShiningEffect(int effectIndex, const char* effectFileName, const char* boneName) { if (IsAffect(AFFECT_INVISIBILITY)) { return; } if (effectIndex >= CItemData::ITEM_SHINING_MAX_COUNT) { return; } if (!strcmp(boneName, "")) { Tracef("Empty bone name for attaching armor shining. Effect Index: %i, EffectFileName: %s", effectIndex, effectFileName); return; } CEffectManager::Instance().RegisterEffect(effectFileName, false, false); m_acceShiningEffects[effectIndex] = m_GraphicThingInstance.AttachEffectByName(0, boneName, effectFileName); } #ifdef ENABLE_ACCE_SYSTEM void CInstanceBase::__ClearAcceShiningEffect(bool detaching) { for (int i = 0; i < CItemData::ITEM_SHINING_MAX_COUNT; i++) { if (detaching) { __DetachEffect(m_acceShiningEffects[i]); } m_acceShiningEffects[i] = 0; } } #endif #endif #endif UserInterface/InstanceBase.cpp "Ahora os voy a explicar algo" En el caso de que vuestro sistema de estolas no lleve el define acce, deberan de cambiar el codigo del sistema en las partes que llevan acce por sash "Por ejemplo en el bloque que agregan en InstanceBase.cpp" Ese lleva ACCE como Define, ustedes deberan de agregar el define de su sistema de estolas GameLib/ItemManager.h Aca buscan la siguiente linea: bool LoadItemTable(const char* c_szFileName); Pulsan enter y agregan lo siguiente: #ifdef ENABLE_SHINING_SYSTEM bool LoadShiningTable(const char* c_szFileName); #endif GameLib/ItemManager.cpp Ahora buscan la siguiente funcion bool CItemManager::LoadItemTable(const char* c_szFileName) { ... } Y debajo de la funcion completa pulsan enter y agregan el siguiente bloque #ifdef ENABLE_SHINING_SYSTEM bool CItemManager::LoadShiningTable(const char* szShiningTable) { CMappedFile File; LPCVOID pData; if (!CEterPackManager::Instance().Get(File, szShiningTable, &pData)) return false; CMemoryTextFileLoader textFileLoader; textFileLoader.Bind(File.Size(), pData); CTokenVector TokenVector; for (DWORD i = 0; i < textFileLoader.GetLineCount(); ++i) { if (!textFileLoader.SplitLine(i, &TokenVector, "\t")) continue; if (TokenVector.size() > (1 + CItemData::ITEM_SHINING_MAX_COUNT)) { TraceError("CItemManager::LoadShiningTable(%s) - LoadShiningTable in %d\n - RowSize: %d MaxRowSize: %d", szShiningTable, i, TokenVector.size(), CItemData::ITEM_SHINING_MAX_COUNT); } const std::string & c_rstrID = TokenVector[0]; DWORD dwItemVNum = atoi(c_rstrID.c_str()); CItemData * pItemData = MakeItemData(dwItemVNum); if (pItemData) { for (BYTE i = 0; i < CItemData::ITEM_SHINING_MAX_COUNT; i++) { if (i < (TokenVector.size()-1)) { const std::string & c_rstrEffectPath = TokenVector[i + 1]; pItemData->SetItemShiningTableData(i, c_rstrEffectPath.c_str()); } else { pItemData->SetItemShiningTableData(i, ""); } } } } return true; } #endif GameLib/ItemData.h Buscan la siguiente linea: ITEM_SOCKET_MAX_NUM = 3, Pulsan un enter y agregan la siguiente debajo #ifdef ENABLE_SHINING_SYSTEM ITEM_SHINING_MAX_COUNT = 3, #endif Ahora buscan la siguiente linea: void SetItemTableData(TItemTable * pItemTable); Pulsan enter y debajo agregan la siguiente: #ifdef ENABLE_SHINING_SYSTEM typedef struct SItemShiningTable { char szShinings[ITEM_SHINING_MAX_COUNT][256]; public: //Checking if any shining is set for this item. bool Any() const { for (int i = 0; i < CItemData::ITEM_SHINING_MAX_COUNT; i++) { if (strcmp(szShinings[i], "")) { return true; } } return false; } } TItemShiningTable; void SetItemShiningTableData(BYTE bIndex, const char* szEffectname); CItemData::TItemShiningTable GetItemShiningTable() { return m_ItemShiningTable; } #endif Ahora buscan la siguiente linea: TItemTable m_ItemTable; Pulsan enter y debajo pegan la siguiente: #ifdef ENABLE_SHINING_SYSTEM TItemShiningTable m_ItemShiningTable; #endif GameLib/ItemData.cpp Ahora buscan la siguiente funcion: BOOL CItemData::IsEquipment() const { .... } Debajo de la funcion agregan lo siguiente: #ifdef ENABLE_SHINING_SYSTEM void CItemData::SetItemShiningTableData(BYTE bIndex, const char* szEffectname) { sprintf(m_ItemShiningTable.szShinings[bIndex], szEffectname); } #endif Ahora buscan la siguiente funcion: void CItemData::Clear() { ..... } Dentro de esa misma funcion buscan la siguiente linea: memset(&m_ItemTable, 0, sizeof(m_ItemTable)); Pulsan un enter y agregan la siguiente linea: #ifdef ENABLE_SHINING_SYSTEM memset(&m_ItemShiningTable, 0, sizeof(m_ItemShiningTable)); #endif Parte del cliente Va a su locale y agregan el archivo que os dejare debajo "Como funciona el sistema y que hago para implementar un arma, ala o efecto de armadura" Bueno para implementar todo el mundo ya conoce como se implementa una arma o estola. Agregan la parte de la db luego item_list.txt, item_proto "Pero aca si usan arma 3D en el archivo haran lo siguiente" 61202 "D:/ymir work/effect/plechito/weapons/dark_cult_set/bell_glow.mse" El 61202 es el vnum del arma, armadura o ala que llevara el efecto Y al lado va la ruta del mse "Asegurese que el efecto esta completo Y ya eso es todo Y eso seria todo Adjunto foto de como funciona el sistema correctamente Si lo hacen tal cual le explique en la guia el sistema le funcionara correctamente. Adjunte foto cuando metan el sistema, no cuesta nada. Archivo parte del cliente shiningtable.txt 1 punto
 -
Free Premium Website 100e + Ticket Panel + Player Management Panel.
lordakiuss reaccionó a DrPolitica por un tema,
Why am I publishing these files .. I bought these files from Fregion LINK to use on my personal server more than 2 months ago, so he gave me a terrible service and yesterday 11/23 came to tell me that I was selling his files and blocked me. I don’t sell his files! I don’t need it. I don’t recommend buying from this person. Make good use of the files. I filed a report on “https://www.metin2downloads.to/” and my messages were deleted to protect it, so I took the liberty of posting.1 punto -

Efectos que puedes usar buenos
SSentry reaccionó a Kenshi Torres por un tema,
Link: https://mega.nz/file/BTxmHZAT#tIS64CjGFbu61Bzb69cv-6LHu22OL0vd9CAoq9Ld9Ug
 1 punto
 -

[c++] Inventario especial
SuperGamix reaccionó a CHELO por un tema,
Link del fix: EkEnvanter.zip 1 punto
 -

Gran Aporte "SISTEMA SHINING COMPLETO"
Abitsai De Leon reaccionó a ChuchoGamer por un tema,
https://ibb.co/sR6pmVy https://ibb.co/rkckK5m https://ibb.co/6RL8nWH https://ibb.co/WBg1gq6 https://ibb.co/fkfKBzv ai estan las fotos en esos link1 punto -

Replica de Web Metin2 y Shop .es
Richard Bajkai reaccionó a Frezi Op por un tema,
THE SHOP AND WEBSITE WORK PERFECTLY Réplica web+itemshop - Rekonise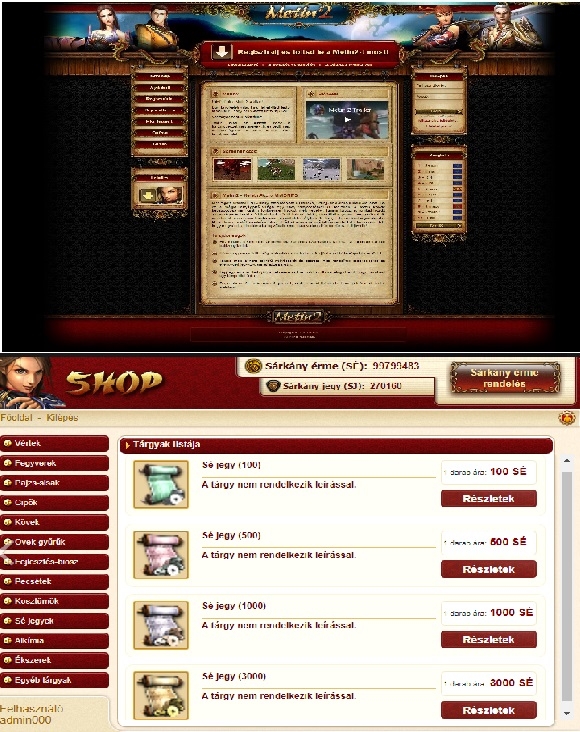 1 punto
 -
WEBS
Papi.Hernan n reaccionó a Frezi Op por un tema,
LES COMPARTO ESTE SET DE BONITAS WEBS DEJEN SU LIKE PACKSdeWEBS - Rekonise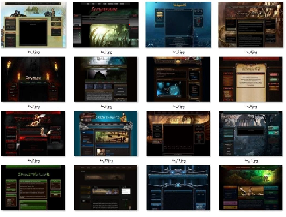 1 punto
 -
Logo de Letras Nuevo de Metin2
enesdnz22 reaccionó a ChuchoGamer por un tema,
Muy buenas Tardes Aqui les comparto este estilo de Letras con el logo para el que quiera usarlo para su Servidor Tambien dejare foto y link Link de la foto https://postimg.cc/s1L5yPvM Link de descarga en Archivo .psd editable para photoshop https://www.mediafire.com/file/b4lls1mjsdmydwi/LogoMetin22.psd/file Logo Creado por mi que lo disfruten1 punto -

Panel de Control Profesional para tu Metin2 /@Carlos
mt2arcangel reaccionó a carlos21 por un tema,
Zone acá les dejo este gran panel de control que es muy amplio puedes hacer muchas cosas en el solo deberán traducirlo ,dejare un video de muestra https://www.youtube.com/watch?t=412&v=z6FV5Ka3oV4 Descargar:https://mega.co.nz/#!NNwwVIJY!su6daXDE1btped_8rrXDGQJXjey_qKomxb49Wj5-k1s1 punto -

WebSite Premiunm (CMS)
autodesk_metin2 reaccionó a Kronixer™ por un tema,
Descarga : https://drive.google.com/file/d/1q3lgpks8OPjDRIJXybl53QO1w_KcHT6H/view?usp=sharing1 punto -
[C++]Specular Color System
macmatta21 reaccionó a Kronixer™ por un tema,
https://drive.google.com/file/d/1mMdNGB3XuZE3H6zvFMfCcGxTCKPqHem6/view?usp=sharing1 punto -
LOGIN GOLD
enesdnz22 reaccionó a DrPolitica por un tema,
1 punto -
hola, acá les paso el sistema que te permite ver el drup de los mob y de las metines. https://mega.nz/#!ldwmiBZR!WdaqMdJ329xNijgaG6_J2wxRh6tXivbRhvTmdunkJsw1 punto
-

Calendario (Eventos)
Marcos Pinheiro reaccionó a TrafalgarLaw por un tema,
Funciona 100%, no tengo fotos en el telefono pero cuando entre ami computador les adjunto una foto del calendario Dentro del rar trae el tutorial, esta todo muy facil de entender. https://www.mediafire.com/file/r7fyd1g58tetr9t/Calendario+V2.rar/file LINK ACTUALIZADO A UN CALENDARIO MEJOR si ya instalaron todo de la parte de python solo reemplazar en root el archivo uievent.py1 punto -
[GUIA]COMO PREPARAR FREESBSD EN DIFERENTES VERSIONES
poveda.caraquiz reaccionó a Kenshi Torres por un tema,
buenas comunidad e visto que la mayoria cuando inicia en este mundo del metin2 se les dificulta preparar freesbsd o hacer copias de vuestros files esta guia es bastante facil y entendible solo espero su agradecimiento ya que esta guia es mas facil como las que estan posteadas aqui que no entienden. suerte chicos como preparar freesbsd abren putty y ejecutan los siguientes comandos: en el paso 5 pueden modificar 11.4-RELEASE por la version de su freesbsd que tiene ejemplo si es version 12.2 solo es colocar 12.2-REALEASE Y LISTO Y ASI SUCESIVAMENTE DEPENDE EL FREESBSD QUE TENGAIS como instarl archivos .tgz o .gz en vps o freesbsd Abren putty y escriben estos comando si desean instalar sus files en el vps o maquina virtual : ahora damos permiso a la maquina despues de aver instalado los archivoz .tgz o .gz en nuestro vps escribimos estos comandos:1 punto -
[c++] Adicional elixir de bonus rojo y azul
santos2002 reaccionó a Kenshi Torres por un tema,
Elixir rojo y azul como en estos servidores pvp. buscar en char_item.ccp Agrega abajo: búscar en char_item.ccp Agrega abajo1 punto -
Python] Barra HP animada>
KiiRo reaccionó a Kenshi Torres por un tema,
Animasyonlu HP Barı.zip 1 punto
 -
Nueva vista del minimapa
santos2002 reaccionó a Kenshi Torres por un tema,
UGMt2 - Minimap.rar 1 punto
 -
Nuevo efecto de Hallooween
Camilo Coronel reaccionó a Kenshi Torres por un tema,
Stone of shadow.rar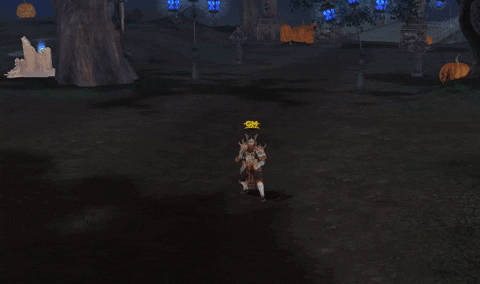 1 punto
 -

[C++] Chest View Drop
santos2002 reaccionó a Metin2HOW por un tema,
Descarga1 punto -

Editar Drop de los Monstruos (Editar Mob Drop, Monstruos Drop)
Diego Arrúa reaccionó a Freddy Di Maria por un tema,
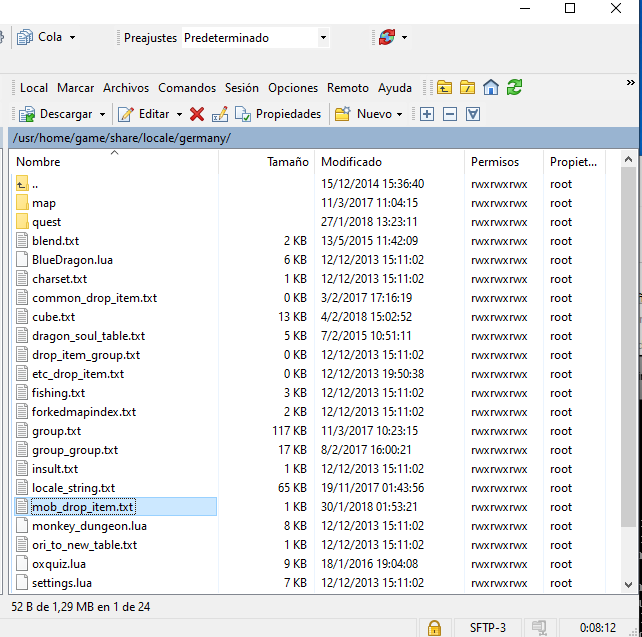
Revisado 01/2021 Buenas aquí abajo les muestro como editar el drop de monstruos Bien después de iniciar el BSD-VDI, tendremos que ir a la ruta siguiente con el Filezilla o WinSCP (Ver como iniciar en WinSCP): Recordar que las rutas difieren de un VDI a otro (ver info de donde descargaron su VDI-BSD, o ir explorando carpeta game en WinSCP) (Ver/Ocultar) /usr/home/game/share/locale/germany Al estar allí tendremos que editar el siguiente archivo: mob_drop_item.txt Damos click derecho y editar con Notepad++ o abrimos el Notepad++ abrimos el archivo en el Notepad++ (si no lo tenemos lo descargamos) (recuerden guardar) tendremos que editar de la siguiente manera el archivo: (Aqui os dejo un txt con el mob_drop.txt completo para que puedan ver como es)Click* Os preguntaréis que significa cada cosa. Bien ahora os lo explicaré, IMPORTANTE hacer una copia de seguridad . GROUP -> Tiene que ir puesto y al lado el nombre. Metin_de_Combate -> Es el nombre del monstruo o metin. Esto es necesario poner un nombre, pero para que no te líes pon el nombre original del monstruo o metin. { -> Sirve para iniciar el dropeo. *Es obligado de poner* } -> Sirve para finalizar el dropeo. *Es obligado de poner* Type -> Tenéis que poner ‘drop' al lado siempre (Ver abajo de los ejemplos mas tipos) Link imagen Navicat mob_proto* Mob -> Aquí al lado debéis de poner el ID vnum del mob (mob_proto) de Navicat>Player>mob_proto que queráis que dropee tal item. a)linea 5 primer numero>1 Significa que es el primer ítem. (Abajo pueden leer un ejemplo de más ítems) Link imagen ítem_proto* b)linea 5 según numero>30 es el ID vnum del ítem_proto en Navicat>Player>item_proto ejemplo /i 15 sería la espada +5. En este caso sería otra arma/armadura/objeto (lo que querais de esta lista). c)linea 5 tercer numero>1 significa cantidad quieres que tire de ese objeto. d)linea 5 cuarto numero>10 significa el porcentaje del drope podemos también poner 0.05(Difícil) o 40 (Mas o menos) 70 casi seguro o también directamente 100. Que significaría la probabilidad que tengas de que te caiga ese objeto determinado. Luego de editar GUARDAN y dan reboot al BSD luego ya lo pueden probar Ejemplos de edición, se debe copiar un 'Group' abajo del otro sin espacio, luego editar los valores y guardar: Group ??(Aquí su nombre o como quieras identificarlo) { mob 503 Type drop 1 30052 1 1 2 290 1 1 3 292 1 0.15 4 1170 1 1 5 2150 1 1 Group ?? { mob 396 Type drop 1 30017 3 7 } **Tener cuidado con el espaciado con el tabulador y ademas las mayúsculas tal cual, y si el VNUM del objeto no existe no iniciara el juego. Eso es suficiente para hacer un drop del mob y ponerlo en su server, ahora unos puntos mas. Tipos de drop : Gracias a -NazoX Puede ser kill_drop y level_limit, el kill_drop te obliga a matar x bichos para tener una suerte de que todo lo que contiene pueda caer, ejemplo: Group Perro_salvaje { Type kill --(Este es de tipo kill, matar x cantidad para conseguir) Mob 171 kill_drop 50 <--(Tienes que matar 50 perros para que haya una prob de éxito de que te caiga lo siguiente) 1 11402 1 1 --(Traje Azul 11402) 2 11209 1 50--(Acero Negro de G 11209) } También si aumentas el % como yo he hecho con las negras 50, después de matar 50 perros es más probable que consigas las negras que el traje azul. Group Perro_salvaje { Type limit --(Este es de tipo limit, según el nivel) mob 171 level_limit 45 <--(Podrás dropear cosas mientras no superes el nivel 45) 1 11402 1 1 --(Traje Azul) 2 11209 1 50--(Acero Negro de G) } Hasta aquí la guía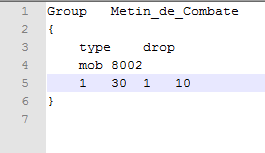
 1 punto
 -

[Guia]Cambiar y Agregar Drops a un Mob
Freddy Di Maria reaccionó a Ryukend por un tema,
Petición hecha por alejandro1995, espero que lo ayude... Primero de todo, encender el server (también se puede dejar en el inicio de sesión) y entrar con FileZilla o WinSCP. Una vez conectado a través del programa ir a: usr / / Rain / share_data / local / Hong Kong / mob_drop_item.txt y abrir suele estar hay. 1. Busque el valor del MOB que quieren cambiar (por ejemplo, 1093: el reaper) y encontraras esto: El nombre en chino color verde es el nombre del cofre del reaper pero puedes usar el numero del item que quieres que dropee es mas facil y comodo asi lo hare yo en la siguiente parte. ¿Que quiere decir cada numero? El color amarillo indica que es el primer item que tirara el Mob. El color Rojo indica el ID del item que dropeara. El color azul indica la cantidad de items que dropeara. El naranja oscuro indica la probabilidad de que caiga tal item (Para una caÃda casi segura poner 50 o más). Para añadir otro item se debe colocar de la siguiente manera: Puedes colocar todos los drops que quieras Nota: No siempre el mob_drop_item.txt viene arreglado en algunos casos es desordenado pero igual es de la misma forma Créditos: La guÃa la saque de otro lado, pero la edite para que sea mas comprensiva Espero les allá gustado1 punto -

[Guia]Cambiar y Agregar Drops a un Mob
MariMT2 reaccionó a XhebasT1an por un tema,
Acá te dejo el archivo de que líneas se deben modificar + las líneas faltantes que no dejaron en la guía y salía error al intentar compilar. Reload.cpp1 punto -

[NEW] Montura de Llama
Edwin Mejia reaccionó a TTV_RANDARON por un tema,
Descargar sin publicidad1 punto -
Caballo.rar Son todas las misiones del oficial, 1 medalla los 45 arqueros salvajes + 100k, subirlo hasta el nivel 10 (más el lv1 que tienes al conseguir el pony) te da la misión del armado, matar los bandidos-arqueros salvajes, serpientes arqueros esos , y su cantidad que no me acuerdo + 500k, y subirlo hasta el 21, y misión del militar, matar en torre los x demonios + 1kk , también trae revivir al caballo, menu del caballo, usar tiquet de monta, (los que canjeas x 25 min), revivirlo con las plantas, y todo. gracias a @Dilong por ayudarme con estas quest en sus tiempos.1 punto
-
quest Caballo Militar begin state start begin when login with pc.level >= 50 begin set_state(information) end end state information begin when letter begin send_letter("Caballo Militar") end when info or button begin say("Caballo Militar") say("Quieres Mejorar Caballo?") say("Aqui Tienes Tu Tarea") say_reward("Matar 300 Arqueros Demonio") say("") pc.setqf("state", 300) q.set_counter("Arqueros Demonio", 300) end when 1002.kill begin local count = pc.getqf("state") - 1 if count <= 300 then pc.setqf("state", count) q.set_counter("Arqueros Demonio", count) end if count == 0 then say_title("Caballo Militar") say("Se ha completado la misión!") say("Usted recibirá:") say_reward("21 Pferdelevel") pc.give_item2(50053, 1) horse.set_level("21") clear_letter() set_state(__COMPLETE__) end end end Caballo Militar http://www.mediafire.com/?7nvgbp89dj17l9k1 punto
-
http://www.mediafire.com/?22ky9ls8goycjl2 Misiones Subir Pony1 punto
-
quest Caballo Lv 10 begin state start begin when login with pc.level >= 35 begin set_state(information) end end state information begin when letter begin send_letter("Caballo Lv 10") end when info or button begin say("Caballo Lv 10") say("Veremos Como Estan Tus Habilidades ") say("De Duelo, Veremos Si Estas Capacitado ") say_reward("Matar 100 arqueros Serpiente o arquero Escorpion") say("") pc.setqf("state", 200) q.set_counter("Arquero Serpiente", 200) end when 2107.kill begin local count = pc.getqf("state") - 1 if count <= 200 then pc.setqf("state", count) q.set_counter("Arquero Serpiente", count) end if count == 0 then say_title("Caballo Lv 10") say("Se ha completado la misión!") say("Usted recibirá:") say_reward("Caballo Armado") say_reward("11 Pferdelevel") pc.give_item2(50052, 1) horse.set_level("11") clear_letter() set_state(__COMPLETE__) end end end state __COMPLETE__ begin end end http://www.mediafire.com/download/1dfwqmxzr5c3639/Caballo_Lv_10.rar Aqui La Otra1 punto
-
quest Caballo Lv1 begin state start begin when login with pc.level >= 25 begin set_state(information) end end state information begin when letter begin send_letter("Caballo Lv 1") end when info or button begin say("Caballo Lv 1") say("Veremos Como Estan Tus Habilidades ") say_reward("Matar 40 arqueros Salvajes") say("") pc.setqf("state", 40) q.set_counter("Arquero Salvaje", 40) end when 503.kill begin local count = pc.getqf("state") - 1 if count <= 40 then pc.setqf("state", count) q.set_counter("Arquero Salvaje", count) end if count == 0 then say_title("Caballo Lv 1") say("Se ha completado la misión!") say("Usted recibirá:") say_reward("Pintura De Caballo") say_reward("1 Pferdelevel") pc.give_item2(50051, 1) horse.set_level("1") clear_letter() set_state(__COMPLETE__) end end La Primera Por Si Error dejo Link http://www.mediafire.com/?hzuy8j6p870gdj51 punto
-
Bien te dejo estas , que le hice a un amigo : http://www.mediafire...dl17llejp36l3wp espero mis gracias u_u1 punto
-

[VIDEOTUTORIAL] Cambiar pong (Cliente y serverfiles)
jose osses reaccionó a DiosMen por un tema,
http://www.youtube.com/watch?v=FL5mhs8GoWQ&feature=player_embedded1 punto -
Joakin47, lo subi aki x que no me deja enviarte mp. moverlo a walpapers gracias.1 punto
-
solo subo unas cuantas imagenes no todas son muchas jejeje el link=http://www.mediafire.com/?84xy3myn1uicsrr1 punto
-
http://pastebin.com/fufWHgFD1 punto
-
jaja estamos igual pero empieza con los martysmaa asi empeze y los llevo los míos mejorando mucho mas jeje0 puntos
-

Skyboxes - Pro Area
Mateusz Kupiec reaccionó a LORDCarlo™ por un tema,
Ya que logre conseguir cuenta en pro-area encontre este skyboxes las imagenes son muy chulas, por si acaso es copy y paste!!!!! <File archivedPath="d:/ymir work/environment/skybox/nightsky_b.dds" type="1"><![CDATA[Sourceymir workenvironmentskyboxnightsky_b.dds]]></File><File archivedPath="d:/ymir work/environment/skybox/nightsky_f.dds" type="1"><![CDATA[Sourceymir workenvironmentskyboxnightsky_f.dds]]></File><File archivedPath="d:/ymir work/environment/skybox/nightsky_l.dds" type="1"><![CDATA[Sourceymir workenvironmentskyboxnightsky_l.dds]]></File><File archivedPath="d:/ymir work/environment/skybox/nightsky_r.dds" type="1"><![CDATA[Sourceymir workenvironmentskyboxnightsky_r.dds]]></File><File archivedPath="d:/ymir work/environment/skybox/nightsky_t.dds" type="1"><![CDATA[Sourceymir workenvironmentskyboxnightsky_t.dds]]></File><File archivedPath="d:/ymir work/environment/nightsky.msenv" type="1"><![CDATA[Sourceymir workenvironmentnightsky.msenv]]></File><File archivedPath="d:/ymir work/environment/skybox/evening_b.dds" type="1"><![CDATA[Sourceymir workenvironmentskyboxevening_b.dds]]></File><File archivedPath="d:/ymir work/environment/skybox/evening_f.dds" type="1"><![CDATA[Sourceymir workenvironmentskyboxevening_f.dds]]></File><File archivedPath="d:/ymir work/environment/skybox/evening_l.dds" type="1"><![CDATA[Sourceymir workenvironmentskyboxevening_l.dds]]></File><File archivedPath="d:/ymir work/environment/skybox/evening_r.dds" type="1"><![CDATA[Sourceymir workenvironmentskyboxevening_r.dds]]></File><File archivedPath="d:/ymir work/environment/skybox/evening_t.dds" type="1"><![CDATA[Sourceymir workenvironmentskyboxevening_t.dds]]></File><File archivedPath="d:/ymir work/environment/evening.msenv" type="1"><![CDATA[Sourceymir workenvironmentevening.msenv]]></File><File archivedPath="d:/ymir work/environment/skybox/sky_b.dds" type="1"><![CDATA[Sourceymir workenvironmentskyboxsky_b.dds]]></File><File archivedPath="d:/ymir work/environment/skybox/sky_f.dds" type="1"><![CDATA[Sourceymir workenvironmentskyboxsky_f.dds]]></File><File archivedPath="d:/ymir work/environment/skybox/sky_l.dds" type="1"><![CDATA[Sourceymir workenvironmentskyboxsky_l.dds]]></File><File archivedPath="d:/ymir work/environment/skybox/sky_r.dds" type="1"><![CDATA[Sourceymir workenvironmentskyboxsky_r.dds]]></File><File archivedPath="d:/ymir work/environment/skybox/sky_t.dds" type="1"><![CDATA[Sourceymir workenvironmentskyboxsky_t.dds]]></File><File archivedPath="d:/ymir work/environment/sky.msenv" type="1"><![CDATA[Sourceymir workenvironmentsky.msenv]]></File><File archivedPath="d:/ymir work/environment/skybox/sunshine_b.dds" type="1"><![CDATA[Sourceymir workenvironmentskyboxsunshine_b.dds]]></File><File archivedPath="d:/ymir work/environment/skybox/sunshine_f.dds" type="1"><![CDATA[Sourceymir workenvironmentskyboxsunshine_f.dds]]></File><File archivedPath="d:/ymir work/environment/skybox/sunshine_l.dds" type="1"><![CDATA[Sourceymir workenvironmentskyboxsunshine_l.dds]]></File><File archivedPath="d:/ymir work/environment/skybox/sunshine_r.dds" type="1"><![CDATA[Sourceymir workenvironmentskyboxsunshine_r.dds]]></File><File archivedPath="d:/ymir work/environment/skybox/sunshine_t.dds" type="1"><![CDATA[Sourceymir workenvironmentskyboxsunshine_t.dds]]></File><File archivedPath="d:/ymir work/environment/sunshine.msenv" type="1"><![CDATA[Sourceymir workenvironmentsunshine.msenv]]></File><File archivedPath="d:/ymir work/environment/skybox/night_b.dds" type="1"><![CDATA[Sourceymir workenvironmentskyboxnight_b.dds]]></File><File archivedPath="d:/ymir work/environment/skybox/night_f.dds" type="1"><![CDATA[Sourceymir workenvironmentskyboxnight_f.dds]]></File><File archivedPath="d:/ymir work/environment/skybox/night_l.dds" type="1"><![CDATA[Sourceymir workenvironmentskyboxnight_l.dds]]></File><File archivedPath="d:/ymir work/environment/skybox/night_r.dds" type="1"><![CDATA[Sourceymir workenvironmentskyboxnight_r.dds]]></File><File archivedPath="d:/ymir work/environment/skybox/night_t.dds" type="1"><![CDATA[Sourceymir workenvironmentskyboxnight_t.dds]]></File><File archivedPath="d:/ymir work/environment/night.msenv" type="1"><![CDATA[Sourceymir workenvironmentnight.msenv]]></File><File archivedPath="d:/ymir work/environment/skybox/predawn_b.dds" type="1"><![CDATA[Sourceymir workenvironmentskyboxpredawn_b.dds]]></File><File archivedPath="d:/ymir work/environment/skybox/predawn_f.dds" type="1"><![CDATA[Sourceymir workenvironmentskyboxpredawn_f.dds]]></File><File archivedPath="d:/ymir work/environment/skybox/predawn_l.dds" type="1"><![CDATA[Sourceymir workenvironmentskyboxpredawn_l.dds]]></File><File archivedPath="d:/ymir work/environment/skybox/predawn_r.dds" type="1"><![CDATA[Sourceymir workenvironmentskyboxpredawn_r.dds]]></File><File archivedPath="d:/ymir work/environment/skybox/predawn_t.dds" type="1"><![CDATA[Sourceymir workenvironmentskyboxpredawn_t.dds]]></File><File archivedPath="d:/ymir work/environment/predawn.msenv" type="1"><![CDATA[Sourceymir workenvironmentpredawn.msenv]]></File><File archivedPath="d:/ymir work/environment/skybox/storm_b.dds" type="1"><![CDATA[Sourceymir workenvironmentskyboxstorm_b.dds]]></File><File archivedPath="d:/ymir work/environment/skybox/storm_f.dds" type="1"><![CDATA[Sourceymir workenvironmentskyboxstorm_f.dds]]></File><File archivedPath="d:/ymir work/environment/skybox/storm_l.dds" type="1"><![CDATA[Sourceymir workenvironmentskyboxstorm_l.dds]]></File><File archivedPath="d:/ymir work/environment/skybox/storm_r.dds" type="1"><![CDATA[Sourceymir workenvironmentskyboxstorm_r.dds]]></File><File archivedPath="d:/ymir work/environment/skybox/storm_t.dds" type="1"><![CDATA[Sourceymir workenvironmentskyboxstorm_t.dds]]></File><File archivedPath="d:/ymir work/environment/storm.msenv" type="1"><![CDATA[Sourceymir workenvironmentstorm.msenv]]></File> Creditos------> KyrieAnn Fuente--------> Pro-Area Link: http://www.mediafire.com/?lt8nhl4ic86l5qt Esta es una pagina donde hay buenos skyboxes: http://www.redsorceress.com/skybox.html0 puntos