
.png.baa68f22b2d02704a1a918ed3a8ae985.png.1fea0f4d835688771a54119d1cd217c1.png)


𝗔𝗿𝗲𝘀
-
Contador contenido
390 -
Ingreso
-
Última visita
-
Días ganados
14
Mensajes publicados por 𝗔𝗿𝗲𝘀
-
-
hace 1 hora, GMShinsso dijo:
Soy Nuevo en esto Pero ya Eh Montado varios file y todo Bien
sucede que esto files vienen con todos los archivos para sistema 4 inventarios y masal intentar poner el sistema 4 inv
me da este erreo en el Syserr
0704 17:59:01369 :: Failed to load script file : UIScript/PopupDialog.py
0704 17:59:01373 ::
ui.py(line:2763) LoadScriptFile
system.py(line:192) execfile
system.py(line:163) Run
UIScript/PopupDialog.py(line:34) <module>LoadScriptFile!!!!!!!!!!!!!! - <type 'exceptions.AttributeError'>:'module' object has no attribute 'MESSAGE'
0704 17:59:01373 :: ============================================================================================================
0704 17:59:01373 :: Abort!!!!
0704 17:59:01425 :: ============================================================================================================
0704 17:59:01426 :: Abort!!!!Debes iniciar sesión para ver el contenido del enlace en esta publicación.LoadScriptFile!!!!!!!!!!!!!! - <type 'exceptions.AttributeError'>:'module' object has no attribute 'MESSAGE'
Te esta marcando que no existe ningun atributo. Pasa el archivo o comunicate conmigo en discord Astaroth#8397 y te ayudare encantadamente
-
hace 5 horas, [ADM]Aquiles dijo:
gracias
Sabes implementarlo o te doy algunas clases? xD
-
hace 5 horas, [ADM]Aquiles dijo:
Adrian que no tienes huevos muerto de hambre
Jajajajajaja hay dios mio que risa das my bro, que pasa que quieres que caiga tu famoso revenge? con esas armas editadas?
-
hace 5 horas, [ADM]Aquiles dijo:
y tu marica sabes meterla?
Jajajajaja 50 euros y encantado de meterte ese sistema
-
hace 1 minuto, ChuchoGamer dijo:
jajajaja yo lo instalo al 100
x2 jajaja si ese sistema es mas facil que el que yo publique xD
-
hace 1 hora, clocki dijo:
Pues como no suelte dinero, me temo que se va a quedar con las ganas.
Pues me parece ami que si jajajjaa
-
-
hace 4 horas, [ADM]Aquiles dijo:
me interesa
Pero sabes meterlo xD
-
- Este es un tema popular.
- Este es un tema popular.
Buenas noches zoneros y zoneras hoy os traigo este set que no he visto publico en ningun foro ni en turkmmo ni en dev ni aca asi que ahora os lo traigo aqui para que le saquen provecho
Aca os dejo algunas fotos:
Debes iniciar sesión para ver el contenido del enlace en esta publicación.Debes iniciar sesión para ver el contenido del enlace en esta publicación.Aca el link:
Debes iniciar sesión para ver el contenido del enlace en esta publicación.Espero que le saquen provecho para este veranico

- Metin2 Primer, Eduusan SS, LooW y 21 mas reacciono a esto
-
 21
21
-
 3
3
-
hace 5 horas, ChuchoGamer dijo:
funciona muy bien lo acabo de instalar y jala al 100 muchas gracias por traerlo
De nada, publica foto de como te quedó

-
hace 2 horas, ChuchoGamer dijo:
este sistema si jala ? bien
Se hay tienen la prueba, solo es un poco complejo de meter
-
Files Zentoria xD
-
hace 5 horas, Lord Ahriman - 3D Modeler dijo:
Hmm yo los probe, son lindos y todo, pero hay un problema en las monturas, cuando vas por el mapa, no cargan los mobs... se demoran bastante...
Eso es un problema tanto en los folder como en la acumulation data de los msm, proximamente publicare alguna guia de como repararlo
-
hace 5 horas, TrafalgarLow dijo:
Buen Aporte, Pero esta en turkmmon pero como la mayoria no conoce ese foro Buen APORTE al traerlo
Pero el que esta en turkmmo esta todo dañado al igual que en el dev. "Revisa el codigo y lo veras" Yo aca lo traigo reparado en todos los sentidos tanto para las skin al igual que como para las alas
-
Justo ahora, 【ℛ-𝓝】ℛ𝔂𝓼𝒆 dijo:
Buen aporte, gracias!
De nada

-
Justo ahora, NazoX dijo:
Dale máquina yo cuando tenga time y arregle el problema que tengo lo intento mete, saludos y gracias.
Dale bro, saludos
-
Justo ahora, NazoX dijo:
Ta to flama esa imagen como se consigue ese skin :V
Ahora si la encuentro la publico para que prueben el sistema
-
- Este es un tema popular.
- Este es un tema popular.
Buenas noches zoneros y zoneras:
En esta ocasion os traigo el sistema Shining completo y reparado para alas y skin de armas ya que veo que no esta publico en ningun foro.
Bueno los archivos que vamos a precisar son los siguientes:
Parte del Src Client o Binario como lo conozcan:
De la carpeta UserInterface:
-.PythonAplication.cpp
-.Locale_inc.h
-.Instancebase.h
-.Instancebase.cpp
De la carpeta GameLib:
-.ItemData.h
-.ItemData.cpp
-.ItemManager.cpp
-.ItemManager.h
Bueno sabiendo ya todo lo que vamos a precisar vamos con la guia
UserInterface/PythonApplication.cpp

Buscamos esta linea:

snprintf(szSkillDescFileName, sizeof(szSkillDescFileName), "%s/skilldesc.txt", localePath);

Damos un enter y pegamos la siguiente:

#ifdef ENABLE_SHINING_SYSTEM
	snprintf(szShiningTable, sizeof(szShiningTable), "%s/shiningtable.txt", localePath);
#endif

Buscamos esta linea:

char szItemDesc[256];

Damos un enter y pegamos la siguiente:

#ifdef ENABLE_SHINING_SYSTEM
	char szShiningTable[256];
#endif

Buscamos esta linea:

	if (!rkSkillMgr.RegisterSkillTable("data/common/skilltable.txt"))
	{
		TraceError("Error while loading skilltable.txt.");
		return false;
	}

Damos un enter y pegamos la siguiente:

#ifdef ENABLE_SHINING_SYSTEM
	if (!rkItemMgr.LoadShiningTable(szShiningTable))
	{
		Tracenf("LoadLocaleData - LoadShiningTable(%s) Error", szShiningTable);
	}
#endif
UserInterface/Locale_inc.h

Aca agregaremos el siguiente define:

#define ENABLE_SHINING_SYSTEM
UserInterface/InstanceBase.h

Aca buscamos la siguiente linea:

		DWORD					m_armorRefineEffect;

Pulsamos un enter y agregamos la siguiente linea:

#ifdef ENABLE_SHINING_SYSTEM
		//2-Dimensions for Left & Right sided effects
		DWORD					m_weaponShiningEffects[2][CItemData::ITEM_SHINING_MAX_COUNT];
		DWORD					m_armorShiningEffects[CItemData::ITEM_SHINING_MAX_COUNT];
		DWORD					m_acceShiningEffects[CItemData::ITEM_SHINING_MAX_COUNT];
#endif

Aca quiero aclarar una cosa:

Si en vuestro sistema de estolas de envez de llevar acce lleva sash cambian la linea anterior por esta:

#ifdef ENABLE_SHINING_SYSTEM
		//2-Dimensions for Left & Right sided effects
		DWORD					m_weaponShiningEffects[2][CItemData::ITEM_SHINING_MAX_COUNT];
		DWORD					m_armorShiningEffects[CItemData::ITEM_SHINING_MAX_COUNT];
		DWORD					m_sashShiningEffects[CItemData::ITEM_SHINING_MAX_COUNT];
#endif

Ahora buscamos la siguiente linea:

		UINT	__GetRefinedEffect(CItemData* pItem);

Pulsamos un enter y agregamos la siguiente:

#ifdef ENABLE_SHINING_SYSTEM
		void	__GetShiningEffect(CItemData* pItem);
		void	__ClearWeaponShiningEffect(bool detaching = true);
		void	__ClearArmorShiningEffect(bool detaching = true);
		void	__ClearAcceShiningEffect(bool detaching = true);
		void	__AttachAcceShiningEffect(int effectIndex, const char* effectFileName, const char* boneName = "Bip01 Spine2");
		void	__AttachWeaponShiningEffect(int effectIndex, const char* effectFileName, const char* boneName = "Bip01");
		void	__AttachArmorShiningEffect(int effectIndex, const char* effectFileName, const char* boneName = "Bip01");
#endif

Aca quiero explicar 1 cosa:

Aca es lo mismo que en la anterior linea, si ustedes de envez de usar acce usan sash remplazan la linea por esta:

#ifdef ENABLE_SHINING_SYSTEM
		void	__GetShiningEffect(CItemData* pItem);
		void	__ClearWeaponShiningEffect(bool detaching = true);
		void	__ClearArmorShiningEffect(bool detaching = true);
		void	__ClearSashShiningEffect(bool detaching = true);
		void	__AttachSashShiningEffect(int effectIndex, const char* effectFileName, const char* boneName = "Bip01 Spine2");
		void	__AttachWeaponShiningEffect(int effectIndex, const char* effectFileName, const char* boneName = "Bip01");
		void	__AttachArmorShiningEffect(int effectIndex, const char* effectFileName, const char* boneName = "Bip01");
#endif
UserInterface/InstanceBase.cpp Buscamos la siguiente funcion void CInstanceBase::SetArmor(DWORD dwArmor) { ... } Y dentro de esta funcion buscamos lo siguiente __GetRefinedEffect(pItemData); Pulsamos un enter y agregamos la siguiente linea: #ifdef ENABLE_SHINING_SYSTEM __GetShiningEffect(pItemData); #endif Quedando asi: __GetRefinedEffect(pItemData); #ifdef ENABLE_SHINING_SYSTEM __GetShiningEffect(pItemData); #endif Ahora dentro de la misma funcion buscamos la siguiente linea: __ClearArmorRefineEffect(); Pulsamos un enter y agregamos lo siguiente: #ifdef ENABLE_SHINING_SYSTEM __ClearArmorShiningEffect(); #endifUserInterface/InstanceBase.cpp Aca buscamos la siguiente funcion: void CInstanceBase::SetAcce "Recuerden que si su sistema de estolas no es acce lo cambian por Sash" { .... } Dentro de esta funcion buscamos lo siguiente: ClearAcceEffect(); Pulsamos un enter y agregamos la siguiente linea: #ifdef ENABLE_SHINING_SYSTEM __ClearAcceShiningEffect(); #endif Luego dentro de la misma funcion mas abajo buscamos lo siguiente: CItemManager::Instance().GetItemDataPointer(dwAcce, &pItemData); "Si no usan acce lo cambian por sash" Pulsamos enter y mas abajo pegamos lo siguiente: #ifdef ENABLE_SHINING_SYSTEM if (pItemData) __GetShiningEffect(pItemData); #endif Quedando asi: CItemManager::Instance().GetItemDataPointer(dwAcce, &pItemData); #ifdef ENABLE_SHINING_SYSTEM if (pItemData) __GetShiningEffect(pItemData); #endif m_GraphicThingInstance.AttachAcce(pItemData, fSpecular);
UserInterface/InstanceBase.cpp

"Ahora atentos en la siguiente funcion ya que si no lo hacen bien no funcionara en las armas ni en las skin"

Buscamos la siguiente funcion:

bool CInstanceBase::SetWeapon(DWORD eWeapon)
{
...
}

Dentro de esta funcion buscamos la siguiente linea:

		__GetRefinedEffect(pItemData);

Pulsamos un enter y agregamos lo siguiente:

#ifdef ENABLE_SHINING_SYSTEM
		__GetShiningEffect(pItemData);
#endif

Ahora buscamos la siguiente linea:

		__ClearWeaponRefineEffect();

Pulsamos un enter y agregamos lo siguiente:

#ifdef ENABLE_SHINING_SYSTEM
		__ClearWeaponShiningEffect();
#endif

"AHORA MUY ATENTOS AL CODIGO QUE PONDRE EN PANTALLA DEBERAN DE HACERLO TAL CUAL LO DEJO ACA" "CON LOS CORCHETES TAL CUAL ESTAN EN LA FUNCION"

MI CODIGO

	CItemData * pItemData;
	if (CItemManager::Instance().GetItemDataPointer(eWeapon, &pItemData))
	{								---------------------------ESTOS CORCHETES DEBERAN DE AGREGARLOS TAL CUAL PUSE ACA
		__GetRefinedEffect(pItemData);
#ifdef ENABLE_SHINING_SYSTEM
		__GetShiningEffect(pItemData);
#endif
	}								---------------------------ESTOS CORCHETES DEBERAN DE AGREGARLOS TAL CUAL PUSE ACA
	else
	{								---------------------------ESTOS CORCHETES DEBERAN DE AGREGARLOS TAL CUAL PUSE ACA
		__ClearWeaponRefineEffect();
#ifdef ENABLE_SHINING_SYSTEM
		__ClearWeaponShiningEffect();
#endif
  }								---------------------------ESTOS CORCHETES DEBERAN DE AGREGARLOS TAL CUAL PUSE ACA

	return true;
}
UserInterface/Instancebase.cpp

Ahora buscamos esta funcion

void CInstanceBase::__Initialize()
{
.....
}

Y dentro de ella vamos a buscar la siguiente linea:

	m_armorRefineEffect = 0;

Pulsamos enter y agregamos la siguiente linea:

#ifdef ENABLE_SHINING_SYSTEM
	__ClearWeaponShiningEffect(false);
#endif
UserInterface/InstanceBase.cpp Ahora agregamos todo este bloque completo al final del archivo #ifdef ENABLE_SHINING_SYSTEM void CInstanceBase::__GetShiningEffect(CItemData* pItem) { bool removeRefineEffect = true; CItemData::TItemShiningTable shiningTable = pItem->GetItemShiningTable(); if (pItem->GetType() == CItemData::ITEM_TYPE_WEAPON) { __ClearWeaponShiningEffect(); if (removeRefineEffect) { bool bRemove = false; for (int i = 0; i < CItemData::ITEM_SHINING_MAX_COUNT; i++) if (strcmp(shiningTable.szShinings[i], "")) bRemove = true; if (bRemove) __ClearWeaponRefineEffect(); } for (int i = 0; i < CItemData::ITEM_SHINING_MAX_COUNT; i++) { if (strcmp(shiningTable.szShinings[i], "")) { #ifdef ENABLE_WOLFMAN_CHARACTER bool twoSidedWeapon = pItem->GetSubType() == CItemData::WEAPON_DAGGER || pItem->GetSubType() == CItemData::WEAPON_CLAW || (IsMountingHorse() && pItem->GetSubType() == CItemData::WEAPON_FAN); #else bool twoSidedWeapon = pItem->GetSubType() == CItemData::WEAPON_DAGGER || (IsMountingHorse() && pItem->GetSubType() == CItemData::WEAPON_FAN); #endif if (twoSidedWeapon) { __AttachWeaponShiningEffect(i, shiningTable.szShinings[i], "PART_WEAPON_LEFT"); } if (pItem->GetSubType() == CItemData::WEAPON_BOW) __AttachWeaponShiningEffect(i, shiningTable.szShinings[i], "PART_WEAPON_LEFT"); else __AttachWeaponShiningEffect(i, shiningTable.szShinings[i], "PART_WEAPON"); } } } #ifdef ENABLE_COSTUME_SYSTEM else if (pItem->GetType() == CItemData::ITEM_TYPE_COSTUME) { #ifdef ENABLE_ACCE_SYSTEM if (pItem->GetSubType() == CItemData::COSTUME_ACCE) { for (int i = 0; i < CItemData::ITEM_SHINING_MAX_COUNT; i++) { if (strcmp(shiningTable.szShinings[i], "")) { __AttachAcceShiningEffect(i, shiningTable.szShinings[i], "Bip01 Spine2"); } } } #endif else if (pItem->GetSubType() == CItemData::COSTUME_BODY) { if (removeRefineEffect) { __ClearArmorRefineEffect(); } for (int i = 0; i < CItemData::ITEM_SHINING_MAX_COUNT; i++) { if (strcmp(shiningTable.szShinings[i], "")) { __AttachArmorShiningEffect(i, shiningTable.szShinings[i]); } } } #ifdef ENABLE_WEAPON_COSTUME_SYSTEM else if (pItem->GetSubType() == CItemData::COSTUME_WEAPON) { __ClearWeaponShiningEffect(); if (removeRefineEffect) { __ClearWeaponRefineEffect(); } for (int i = 0; i < CItemData::ITEM_SHINING_MAX_COUNT; i++) { if (strcmp(shiningTable.szShinings[i], "")) { bool twoSidedWeapon = pItem->GetValue(3) == CItemData::WEAPON_DAGGER || (IsMountingHorse() && pItem->GetValue(3) == CItemData::WEAPON_FAN); if (twoSidedWeapon) { __AttachWeaponShiningEffect(i, shiningTable.szShinings[i], "PART_WEAPON_LEFT"); } if (pItem->GetValue(3) == CItemData::WEAPON_BOW) __AttachWeaponShiningEffect(i, shiningTable.szShinings[i], "PART_WEAPON_LEFT"); else __AttachWeaponShiningEffect(i, shiningTable.szShinings[i], "PART_WEAPON"); } } } #endif } #endif else { if (removeRefineEffect) { __ClearArmorRefineEffect(); } for (int i = 0; i < CItemData::ITEM_SHINING_MAX_COUNT; i++) { if (strcmp(shiningTable.szShinings[i], "")) { __AttachArmorShiningEffect(i, shiningTable.szShinings[i]); } } } } //Attaching the shining effect. //BoneName can be "PART_WEAPON" or "PART_WEAPON_LEFT" to get the attaching bone name dynamically. //If boneName is not given "Bip01" is used as boneName. void CInstanceBase::__AttachWeaponShiningEffect(int effectIndex, const char* effectFileName, const char* boneName) { if (IsAffect(AFFECT_INVISIBILITY)) { return; } if (effectIndex >= CItemData::ITEM_SHINING_MAX_COUNT) { return; } CEffectManager::Instance().RegisterEffect(effectFileName, false, false); if (!strcmp(boneName, "PART_WEAPON")) { const char* c_szRightBoneName; m_GraphicThingInstance.GetAttachingBoneName(CRaceData::PART_WEAPON, &c_szRightBoneName); if (c_szRightBoneName == NULL) return; if (strcmp(c_szRightBoneName, "")) { m_weaponShiningEffects[0][effectIndex] = m_GraphicThingInstance.AttachEffectByName(0, c_szRightBoneName, effectFileName); } } else if (!strcmp(boneName, "PART_WEAPON_LEFT")) { const char* c_szLeftBoneName; m_GraphicThingInstance.GetAttachingBoneName(CRaceData::PART_WEAPON_LEFT, &c_szLeftBoneName); if (c_szLeftBoneName == NULL) return; if (strcmp(c_szLeftBoneName, "")) { m_weaponShiningEffects[1][effectIndex] = m_GraphicThingInstance.AttachEffectByName(0, c_szLeftBoneName, effectFileName); } } else { Tracef("Invalid partname for getting attaching bone name. %s - %s", effectFileName, boneName); } } //Attaching the armor shining effect. //If boneName is not given "Bip01" is used as boneName. void CInstanceBase::__AttachArmorShiningEffect(int effectIndex, const char* effectFileName, const char* boneName) { if (IsAffect(AFFECT_INVISIBILITY)) { return; } if (effectIndex >= CItemData::ITEM_SHINING_MAX_COUNT) { return; } if (!strcmp(boneName, "")) { Tracef("Empty bone name for attaching armor shining. Effect Index: %i, EffectFileName: %s", effectIndex, effectFileName); return; } CEffectManager::Instance().RegisterEffect(effectFileName, false, false); m_armorShiningEffects[effectIndex] = m_GraphicThingInstance.AttachEffectByName(0, boneName, effectFileName); } //Clears all weapon shining effects. Left & Right if set. void CInstanceBase::__ClearWeaponShiningEffect(bool detaching) { for (int i = 0; i < CItemData::ITEM_SHINING_MAX_COUNT; i++) { if (m_weaponShiningEffects[0][i]) { if (detaching) { __DetachEffect(m_weaponShiningEffects[0][i]); } m_weaponShiningEffects[0][i] = 0; } if (m_weaponShiningEffects[1][i]) { if (detaching) { __DetachEffect(m_weaponShiningEffects[1][i]); } m_weaponShiningEffects[1][i] = 0; } } } //Clears all armor shining effects. void CInstanceBase::__ClearArmorShiningEffect(bool detaching) { if (detaching) { for (int i = 0; i < CItemData::ITEM_SHINING_MAX_COUNT; i++) { if (m_armorShiningEffects[i]) { __DetachEffect(m_armorShiningEffects[i]); } } } memset(&m_armorShiningEffects, 0, sizeof(m_armorShiningEffects)); } #endif #ifdef ENABLE_SHINING_SYSTEM #ifdef ENABLE_ACCE_SYSTEM void CInstanceBase::__AttachAcceShiningEffect(int effectIndex, const char* effectFileName, const char* boneName) { if (IsAffect(AFFECT_INVISIBILITY)) { return; } if (effectIndex >= CItemData::ITEM_SHINING_MAX_COUNT) { return; } if (!strcmp(boneName, "")) { Tracef("Empty bone name for attaching armor shining. Effect Index: %i, EffectFileName: %s", effectIndex, effectFileName); return; } CEffectManager::Instance().RegisterEffect(effectFileName, false, false); m_acceShiningEffects[effectIndex] = m_GraphicThingInstance.AttachEffectByName(0, boneName, effectFileName); } #ifdef ENABLE_ACCE_SYSTEM void CInstanceBase::__ClearAcceShiningEffect(bool detaching) { for (int i = 0; i < CItemData::ITEM_SHINING_MAX_COUNT; i++) { if (detaching) { __DetachEffect(m_acceShiningEffects[i]); } m_acceShiningEffects[i] = 0; } } #endif #endif #endifUserInterface/InstanceBase.cpp "Ahora os voy a explicar algo" En el caso de que vuestro sistema de estolas no lleve el define acce, deberan de cambiar el codigo del sistema en las partes que llevan acce por sash "Por ejemplo en el bloque que agregan en InstanceBase.cpp" Ese lleva ACCE como Define, ustedes deberan de agregar el define de su sistema de estolas
GameLib/ItemManager.h

Aca buscan la siguiente linea:

		bool			LoadItemTable(const char* c_szFileName);

Pulsan enter y agregan lo siguiente:

#ifdef ENABLE_SHINING_SYSTEM
		bool			LoadShiningTable(const char* c_szFileName);
#endif
GameLib/ItemManager.cpp

Ahora buscan la siguiente funcion

bool CItemManager::LoadItemTable(const char* c_szFileName)
{
...
}

Y debajo de la funcion completa pulsan enter y agregan el siguiente bloque

#ifdef ENABLE_SHINING_SYSTEM
bool CItemManager::LoadShiningTable(const char* szShiningTable)
{
	CMappedFile File;
	LPCVOID pData;

	if (!CEterPackManager::Instance().Get(File, szShiningTable, &pData))
		return false;

	CMemoryTextFileLoader textFileLoader;
	textFileLoader.Bind(File.Size(), pData);

	CTokenVector TokenVector;
	for (DWORD i = 0; i < textFileLoader.GetLineCount(); ++i)
	{
		if (!textFileLoader.SplitLine(i, &TokenVector, "\t"))
			continue;

		if (TokenVector.size() > (1 + CItemData::ITEM_SHINING_MAX_COUNT))
		{
			TraceError("CItemManager::LoadShiningTable(%s) - LoadShiningTable in %d\n - RowSize: %d MaxRowSize: %d", szShiningTable, i, TokenVector.size(), CItemData::ITEM_SHINING_MAX_COUNT);
		}

		const std::string & c_rstrID = TokenVector[0];
		DWORD dwItemVNum = atoi(c_rstrID.c_str());

		CItemData * pItemData = MakeItemData(dwItemVNum);
		if (pItemData)
		{
			for (BYTE i = 0; i < CItemData::ITEM_SHINING_MAX_COUNT; i++)
			{
				if (i < (TokenVector.size()-1))
				{
					const std::string & c_rstrEffectPath = TokenVector[i + 1];
					pItemData->SetItemShiningTableData(i, c_rstrEffectPath.c_str());
				}
				else
				{
					pItemData->SetItemShiningTableData(i, "");
				}
			}
		}
	}

	return true;
}
#endif
GameLib/ItemData.h

Buscan la siguiente linea:

			ITEM_SOCKET_MAX_NUM = 3,

Pulsan un enter y agregan la siguiente debajo

#ifdef ENABLE_SHINING_SYSTEM
	ITEM_SHINING_MAX_COUNT = 3,
#endif

Ahora buscan la siguiente linea:

		void SetItemTableData(TItemTable * pItemTable);

Pulsan enter y debajo agregan la siguiente:

#ifdef ENABLE_SHINING_SYSTEM
		typedef struct SItemShiningTable {
			char szShinings[ITEM_SHINING_MAX_COUNT][256];
		public:
			//Checking if any shining is set for this item.
			bool Any() const
			{
				for (int i = 0; i < CItemData::ITEM_SHINING_MAX_COUNT; i++)
				{
					if (strcmp(szShinings[i], ""))
					{
						return true;
					}
				}
				return false;
			}
		} TItemShiningTable;
		void SetItemShiningTableData(BYTE bIndex, const char* szEffectname);
		CItemData::TItemShiningTable GetItemShiningTable() { return m_ItemShiningTable; }
#endif

Ahora buscan la siguiente linea:

		TItemTable m_ItemTable;

Pulsan enter y debajo pegan la siguiente:

#ifdef ENABLE_SHINING_SYSTEM
		TItemShiningTable m_ItemShiningTable;
#endif
GameLib/ItemData.cpp

Ahora buscan la siguiente funcion:

BOOL CItemData::IsEquipment() const
{
....
}

Debajo de la funcion agregan lo siguiente:

#ifdef ENABLE_SHINING_SYSTEM
void CItemData::SetItemShiningTableData(BYTE bIndex, const char* szEffectname)
{
	sprintf(m_ItemShiningTable.szShinings[bIndex], szEffectname);
}
#endif

Ahora buscan la siguiente funcion:

void CItemData::Clear()
{
.....
}

Dentro de esa misma funcion buscan la siguiente linea:

	memset(&m_ItemTable, 0, sizeof(m_ItemTable));

Pulsan un enter y agregan la siguiente linea:

#ifdef ENABLE_SHINING_SYSTEM
	memset(&m_ItemShiningTable, 0, sizeof(m_ItemShiningTable));
#endif
Parte del cliente

Va a su locale y agregan el archivo que os dejare debajo

"Como funciona el sistema y que hago para implementar un arma, ala o efecto de armadura"

Bueno para implementar todo el mundo ya conoce como se implementa una arma o estola.

Agregan la parte de la db luego item_list.txt, item_proto

"Pero aca si usan arma 3D en el archivo haran lo siguiente"

61202	"D:/ymir work/effect/plechito/weapons/dark_cult_set/bell_glow.mse"

El 61202 es el vnum del arma, armadura o ala que llevara el efecto

Y al lado va la ruta del mse "Asegurese que el efecto esta completo

Y ya eso es todo
Y eso seria todo
Adjunto foto de como funciona el sistema correctamente

Si lo hacen tal cual le explique en la guia el sistema le funcionara correctamente.
Adjunte foto cuando metan el sistema, no cuesta nada.
Archivo parte del cliente
Debes iniciar sesión para ver el contenido del enlace en esta publicación. -
Justo ahora, Getzuga dijo:
viejo si ofendi mis disculpas. es que siento algo hostil tu respuesta!
Ami porque me vas a ofender, simplemente te respondi nomas.
-
hace 20 minutos, Getzuga dijo:
jajaja entre aqui bsucando algo parecido que el amigo del post, pro, ya lei sus respuestas y no gracias, yo quiero algo perfectamente echo bien trabajado sin bugs, o, al menos que los tenga al minimo, ya que lo que quiero hacer como server es realmente grande
Pues buena suerte men
-
hace 11 horas, JohnTonS dijo:
¡Hola un saludo!
Como lo dice el tema principal busco personal para un proyecto a largo plazo los cuales se basará uno en el Oficial (Global Multi Lenguaje) y el Otro (Hispano, con posibilidad de globalizarlo), al igual con algunas modificaciones las cuales tienen una jugabilidad excelente, por lo cual tendrán al Jugador entretenido. y darán sus frutos.
Los recursos de pagos de administración y gastos compra de sistemas e.t.c tanto como VPS & otros serán pagos por mi, no quiero que haya ingresos extras por parte del equipo, ya si un miembro del mismo quiere aportar para cualquier gastos totalmente diferente. Actualmente estoy trabajando en local en ambos servidor los cuales van en un avance de un 70%, que es un avance potencial y tengo buenas bases las cuales tiene una estabilidad y que los errores que se presenten en el camino se solucione en grupo y podamos tener servicios de calidad.
Actualmente estoy buscando (tome algunas descripciones, para los que no sepan que significa):
- Trial Game Master (TGM): Es el Game Master en fase de formación, sin embargo, esto no quiere decir no posea autoridad en el juego, ya que posee las mismas funciones y responsabilidades de un GM completo.
- Game Master (GM): Es el encargado de los servidores y el primer contacto de los jugadores ante preguntas referentes al juego, problemas técnicos, baneos, denuncias y demás situaciones vinculadas al mismo, también son los encargados de garantizar que todo vaya acorde a lo establecido en los servidores.
- Super Game Master (SGM): Es la persona encargada de la formación y supervisión de los GMs, esto se refiere a que realicen eficientemente su trabajo y resuelvan los problemas de manera adecuada. También son los responsables de atender a usuarios con problemas, quejas, dudas o baneos que los usuarios no han podido solucionar con los GMs.
- Game Admin (GA): Coordina y forma al equipo de Juego, así como su trabajo y responsabilidades. Tiene como funciones ofrecer la información de actualidad a la comunidad, reportar los problemas que surjan y velar porque la administración en juego sea la correcta, atender a usuarios con problemas que no pueden resolver los SGMs.
- Board Admin (BA): Es la persona encargada de toda la información y ayuda en el foro, el cual debe estar pendiente de todo lo pertinente que se presente en el y mantener al día con las actualizaciones.
- Moderator (MOD): Persona encargada junto al (BA), para la ayuda que sea pertinente al momento que se necesite, también tendrá un rol importante junto a (DES) & (NM); el cual estará pendiente de que el trabajo de estos ambos cargos cumplan con su labor.
- Designer (DES): Es el encargado principal del aspecto grafico de los servidores, por el cual mantendrá el diseño constante en lo que sea necesario.
- Newtwork Manager (NH): Persona que se encarga de todo el manejo de la pagina web y que las conexiones estén funcionando correctamente, resuelve dudas sobre el estado del servidor entre otros.
No busco personas que tengan un tiempo completo, pero que por lo menos dediquen diariamente un máximo de 6hrs en el cargo que se le designe posteriormente este horario puede ir cambiando depende al curso que tome el servidor, puede ser que un día te toque estar todo el día y otro día que solamente dures una hora en tu puesto.
Para el rol de Designer (DES), yo cuento ya con toda la parte grafica del servidor, solamente necesito que sepa del tema y que modifique ya que todo esta en .PSD.
Actualmente estoy solo en el proyecto y pues quisiera ver que personas hay interesadas en estos ámbitos, a excepción si sabes algo de Programación que no este incluido en el mismo podrías demostrarme tus habilidades y así trabajar en ese rol.
Quedo atento a cual información puedes escribirme al Discord: JohnTonS#5383
Tengo una pequeña pregunta asi que me ha extrañado.
No estabas trabajando con Kronixer? Porque como veo que pones que estas actualmente solo en el proyecto pues me extraño
Y como dice nazox lo peor que puedes contratar aca es a un DEV ya que hay mucha gente que van de programadores y solo quieren sacarte la pasta o te meten sitemas bugueados por todos lados. Lo mejor que puedes hacer es buscar a alguien de confianza o que sepas que no te va a fallar durante todo el proyecto al igual que sepa lo que hace.
Para la parte de programacion te recomiendo a LordNejix, Kronixer "Aunque hay muchisima mas gente que sabe de programacion pero no recuerdo nombres xd"
Como para la parte de las quest, misiones y eventos claramente el mas recomendado es Camilo
Y si precisas de mappers esta Anthonys o Yo
Espero que tengas suerte en tu proyecto.
-
Buenas tardes zoneros.
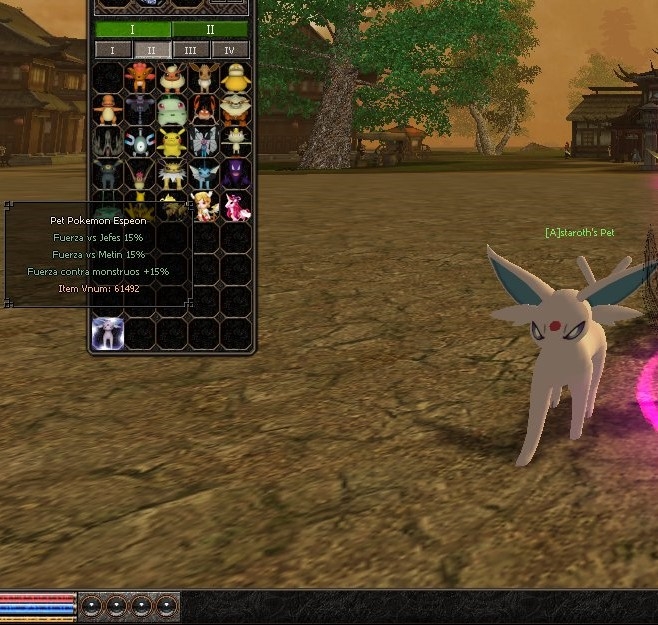
Para todas aquellas personas que de seguro les ha pasado como a mi, que an agregado alguna mascota pero no se le ve el bonus que otorga. Os vengo a decir como hacer que si salga
Es muy sencillo solo basta con que hagan lo siguiente
Van a su archivo constinfo.py de la carpeta root y buscan esto

def IS_PET_SEAL_OLD(itemVnum):

Aca veran un listado con una serie de vnums "Esos vnum son los items que invocan a cada pet"

Ahora para que en el nuevo pet que implementaron si le aparezcan los bonus agregan la siguiente linea debajo de la anterior

	elif itemVnum >= 61484 and itemVnum <= 61506:
		return 1

Quedando asi

def IS_PET_SEAL_OLD(itemVnum):
	if itemVnum == 38200 or itemVnum == 38201:
		return 1
	elif itemVnum >= 53006 and itemVnum <= 53283:
		return 1
	elif itemVnum == 48301 or itemVnum == 48311 or itemVnum == 48321:
		return 1
	elif itemVnum >= 61484 and itemVnum <= 61506:
		return 1

  El 61484 es el minimo vnum del pet que implementaron

  Por ejemplo si implementan 2 pets y ponen 61484 y al siguiente le ponen 61485 quedaria tal que asi

  	elif itemVnum >= 61484 and itemVnum <= 61485:
		return 1

  Luego si meten por ejemplo 30 pets y el ultimo termina en 61520 y el primero empieza por 61480 seria tal que asi

    	elif itemVnum >= 61480 and itemVnum <= 61520:
		return 1

 Los pets que sean mas de 61480 y menos que 61520 si se le apareceran los bonus que ustedes pusieron
  Ahora si el pet tiene 61521 y ustedes pusieron 61520 como en este caso. El pet aparecera sin bonus.

  "QUIERO ACLARAR QUE ESTA GUIA ESTA EXPLICADA PARA LOS FILES WOM2"
Espero que esta guia les haya servido y no tengan mas problemas con las pets.
Adjunto foto para que vean que si funciona.
-
Ya hice yo una guia completa de ese sistema reparado
-
Buenos días zoneros y zoneras
En esta ocasion os traere una guia completa de como implementar vuestras monturas para el servidor.
Esta guía la subire para los files mas utilizados "En este caso los que mas se usan y los cuales la gente estan teniendo mas problemas a la hora de implementar es en los WoM2"
Aunque en casi todos los files tiene la misma manera. Solamente en algunos files tambien lo llama tambien desde la quest.
Bueno primero de todo recuerden tener la montura completa y el icono del sello que van a utilizar.
Primero vamos a nuestro mob_proto del navicat y agregamos la siguiente linea.

20406	Dragon Oscuro	Temn� Drak	Dunkler Drache	Dark Dragon	Dragon Oscuro	Sut�t S�rk�ny	Drago Oscuro	Ciemny S	mok	Dragao Escuro	Dragon Intunecat	Karanlik Ejderha	5	1	0	1	0		0		STUN,SLOW,CURSE,TERROR	0	dragon_mount_fly	2	0	0	0	0	0	0	240	3	1	0	0	20	4	100	100	0	2000	150	0	0	0	0	0	0	0	0	0	0	0	0	0	0	0	0	0	0	0	0	0	0	0	0	0	0	0	0	0	0	0	0	0	0	0	0	0	0	0

Recuerden no tener el vnum repetido y cambiar el folder que es el nombre de la carpeta que va en el game/share/data/monster para que no tengan problemas

Luego si quieren cambiarle los bonus van a las columnas applytipe0 applyvalue0 applytipe1 applyvalue1 y asi hasta el ultimo y agregan los bonus que deseen

Dejenme recordarles que en el applytipe va el numero del bonus y en applyvalue va el valor que dara ese bonus

Mas abajo os dejare un link con todos los ids de los bonus
Cuando agreguen la linea en el mob_proto pasaremos al item_proto y hacemos lo siguiente
En el item_proto agregaremos la siguiente linea

30907	Dragon Oscuro	Temn� Drak	Dunkler Drache	Dark Dragon	Dragon Oscuro	Sut�t S�rk�ny	Drago Oscuro	Ciemny S	mok	Dragao Escuro	Dragon Intunecat	Karanlik Ejderha	28	2	0	1	0	8192	0		0	0	52011	0	0	0	10	1	0	0	63	30	116	30	119	15	0	20406	0	0	0	0	-1	-1	-1	-1	-1	-1	0	0	0

Aca para que la montura les funcione tienen que tener en cuenta 2 cosas

La primera es que el type siempre debera de estar en 28 para que el sello funcione

Y la segunda es que en la columna value1 deberan de agregar el vnum del mob que agregaron anteriormente. "Aca en mi caso el vnum del mob es 20406" Ya en vuestro caso sera el vnum que agregaron
Cuando terminen con el item_proto y mob_proto guardan los archivos y los compilan con el MYSQL2PROTO para que os den la parte del cliente
Luego de eso vamos a los siguientes archivos y hacen lo siguiente
1-.Archivo npclist.txt

Aca agregaran el vnum de la montura seguido del msm

Ejemplo

20406	nombre_msm_montura

"Recuerden tambien verificar la carpeta agregandola con el 0"
"Si no saben como es asi"

0	aca_el_nombre_del_msm	aca_el_nombre_de_la_carpeta_de_la_montura/aca_el_nombre_del_msm

Ejemplo

0	plechi_shadow_scythe	plechito_shadow\plechi_shadow_scythe

Recuerden que estas lineas van al principio con los demas 0
2-. itemlist.txt

Aca agregaran el vnum del sello de la montura y la ruta del icono

"Recomiendo que el nombre del icono sea el mismo que es el vnum"

Ejemplo

78011	ETC	icon/item/78011.tga
Los archivos que van en la parte share/data/monster son los siguientes

Solamente agregaran el motlist.txt y los msa ya que si agregan los gr2 o los dds puede tumbarle el servidor.
Si lo hacen todo tal cual les comente no deberian de tener ningun problema a la hora de implementar una montura en los files WoM2
"Lo digo porque llevo ya mas de 50 monturas implementadas sin ningun tipo de problema"
Pagina para los bonus:
Debes iniciar sesión para ver el contenido del enlace en esta publicación.- Marcos Pinheiro, MariMT2, LiveTime 97 y 3 mas reacciono a esto
-
6

Tengo dudas espero respuesta y ayuda xD
en Ayudas y preguntas
Publicado
En la tabla item proto hay una celda llamada refined_vnum o algo asi tienes que agregar el vnum del arma a la que quieres que evolucione
Ejemplo:
VNUM Name Refined_vnum
19 Espada +9 29
El 19 es el item que mejoras
Y el 29 es al item que evoluciona